Category Archives: Tips

How to Write and Publish a Technical Book and Not Lose Your Sanity

Earlier this year, I published my third book, Writing High-Performance .NET Code (2nd Edition), my second that was fully self-published. In this article I want to detail a topic that I found incredibly under-documented as I went through the process of writing this revision: the technical process of managing a book’s manuscript.

This won’t cover how to actually write content, or how to work with Amazon, CreateSpace, Smashwords, or the other publishers out there. It’s just about how you go from manuscript to PDF (or EPUB) in a way that is infinitely and quickly repeatable.

This can be more complicated than you think. To illustrate this, let me explain my (very broken) process for the first edition of this book.

First Edition

The first edition of Writing High-Performance .NET Code was written entirely in Microsoft Word. While easy to get started because of its familiarity (as well as the great reviewing tools when it came time for proofreading from my editor), it ended up being a curse in the long run.

  • Reorganization of content was awful. Trying to move entire chapters, or even just sections, can be very difficult once you have a lot of layout already done. I often had to rework page headings, page numbering, and various style issues after the move.
  • Adding formatting is very tedious. Since this is a programming book that will actually be printed, there are a huge number of stylistic factors that need to be considered. There are different fonts for code blocks, inline code, and tons of other features. Code samples need to be shaded and boxed. There needs to be correct spacing in lists, around lists, after paragraphs, before and after headings, and tons more. A point-and-click/WYSIWYG interface actually becomes a severe bottleneck in this case. Then, as mentioned in the first bullet–once you reorganize something, there’s a good chance you’ll need to double-check a lot of formatting. No matter how nit-picky you’re being, you need to be much more. It’s excruciating doing this in Word.
  • Control over PDF creation is very limited. Word only gives you a few knobs. I didn’t feel like springing for the full version of Acrobat.
  • Exporting to EPUB/HTML creates extremely messy HTML. Hundreds of styles, very bloated HTML. The HTML actually needed to be hand-edited in many cases. And in the end, I actually needed three versions of the EPUB file, so making post-publishing edits became triply awful.
  • Every time I needed to make a correction, the editing process was tedious beyond belief. Re-exporting from Word was a non-starter because of how much manual cleanup I had to do. Instead, I made fixes in up to 6 individual files (Master copy, EPUB, EPUB for Smashwords, EPUB for Kindle conversion, Word file for online PDF, Word file for print PDF). Yuck.

2nd Edition

When I decided to update the book for the 2nd edition, I knew I wasn’t going to repeat this awful process. I needed a completely new way of working.

My main requirement was: Trivial to go from a single source document to all publishable formats. I wanted one source of truth that generated all destination formats. I wanted to type “build” and be able to upload the resulting file immediately.

Enter Scrivener. During the review process for the first edition, a friend’s wife mentioned Scrivener to me. So it was the first thing I tried. Scrivener has a lot of features for writers of all sorts, but the things that I liked were:

  • Trivial reorganization of sections and chapters. Documents are organized in a tree hierarchy which becomes your chapters and sections. Reordering content is merely a matter of dragging nodes around.
  • Separates formatting from content. There is no WYSIWYG editing here. (You can change the text formatting–but it’s just for your comfort in editing. It has nothing to do with the final product.) In the end, I’m fudging this line a bit because I’m using a Markdown syntax.
  • Integration with Multimarkdown. This formed the basis for both print and electronic editions. Since everything is just text and Multimarkdown supports inclusion of Latex commands
  • Simple export process. I just tell it to compile my book and it combines all the nodes in a tree (you have a lot of control over how this happens) and produces a single file that can either be published directly or processed more.

Setting up the right process took quite a bit of trial and error (months), but I ended up with something that worked really well. The basic process was this:

  • Top-level nodes are chapters, with multiple sections underneath.
  • First-level formatting in Multimarkdown syntax.
  • Second-level formatting in Latex syntax, hidden inside Multimarkdown comments.
  • Using Scrivener, export book to Multimarkdown (MMD) file.
  • EPUB conversion happens directly from MMD file.
  • PDF conversion happens by converting MMD file to a TEX file, then from TEX to PDF.

Let’s look at a few of these pieces in more detail.

Multimarkdown

Multimarkdown is a specific variant of a family of markdown products which attempts to represent simple formatting options in plain text.
For example, this line:

* **# Induced GC**: Number of times `GC.Collect` was called to explicitly start garbage collection.

indicates that this is a bullet point with some bolded text, and GC.Collect is in a different font, indicating a code-level name.

There is Multimarkdown syntax for headers, links, images, tables, and much more.

However, it doesn’t have everything. If you’re doing a print book, it likely won’t be enough if you use anything but the most basic of formatting.

Latex

For advanced formatting, the industry standard is Latex. It is its own programming language and can get quick complex. However, I found getting started fairly easy. One of the best advantages of using Latex is that it has sensible defaults for everything–it just makes a good book automatically. You just change the things you notice need changing. There are tons of examples and communities out there that can help. See the section at the end for useful links.

Latex was included by putting commands inside the manuscript, inside HTML comments (which Multimarkdown would ignore), like this:

<!-- \medskip -->

The most important part of using Latex is setting up the environment–this is basically where you set up how you want all the various elements in your book to look by default. Here’s an excerpt:

<!--
\documentclass[12pt,openright]{book}
\usepackage[paperwidth=7.5in, paperheight=9.25in, left=1.0in, right=0.75in, top=1.0in, 
                                bottom=1.0in,headheight=15pt, ]{geometry}
\usepackage{fancyhdr}
\usepackage[pdftex,
pdfauthor={Ben Watson},
pdftitle={Writing High-Performance .NET Code},
pdfsubject={Programming/Microsoft/.NET},
pdfkeywords={Microsoft, .NET, JIT, Garbage Collection},
pdfproducer={pdflatex},
pdfcreator={pdflatex}]{hyperref}

\usepackage[numbered]{bookmark}

% Setup Document
% Setup Headings

\pagestyle{fancy}
\fancyhead[LE]{\leftmark}
\fancyhead[RE]{}
\fancyhead[LO]{}
\fancyhead[RO]{\rightmark}

... hundreds more lines...added as needed over time...
-->

By doing all of that, I get so many things for free:

  • Default formatting for almost everything, including code listings, table of contents, index, headers
  • Page setup–size, header layout and content
  • Fonts
  • Colors for various things (EPUB and PDF editions)
  • Paragraph, image, code spacing
  • Tons more.

One problem that vexed me for a few days was dealing with equations. Latex has equations, and there is even a Latex equation translator for EPUB, but it doesn’t work in Kindle. Since I only had three equations in the whole book, I decided not to do something special for Kindle, but simplify the EPUB formatting significantly. The other option is to convert the equations to images, but this can be tricky, and it would not be automated. I still wanted a fancy-looking equation in the PDF and print editions. So I came up with something like this:

<!--\iffalse-->
0.01 * P * N
<!--\fi-->
<!--\[ \frac{P}{100}{N} \]-->

For anything where Latex is doing the document processing, the first statement will be ignored because it’s in an \iffalse, and the second statement will be used. If Latex isn’t being processed, then text in the first statement is used and the rest ignored.

I used similar tricks elsewhere when I needed the formatting in the printed edition to be different than the simpler electronic versions.

MMD –> Latex Problems

There were still some issues that don’t automatically translate between MMD and Latex–there were fundamental incompatibilities in the EPUB and PDF translation processes, so I still had to write a custom preprocessor that replaced some MMD code with something more suitable for print. For example, when mmd.exe translates an MMD file to a TEX file, it has certain latex styles it uses by default. I could never figure out how to customize these styles, so I just did myself with a preprocessor.

Benefits

So what have I gained now?

  • All my content is just text–no fiddling with visual styles.
  • Formatting control is trivial with Multimarkdown syntax.
  • Additional specificity for PDFs is achieved with Latex inline in the document (or in the document header).
  • A single command exports the whole book to a single MMD file.

The MMD file is the output of the writing process. But it’s just the input to the build system.

Build System

Yep, I wrote a build system for a book. This allowed me to do things like “build pdf” and 30 seconds later out pops a PDF that is ready to go online.

Confession: the build system is just a Windows batch file. And a lot of cobbled tools.

The top of the file was filled with setting up variables like this:

@echo off

REM Setup variables

SET PRINTTRUEFALSE=false{print}
SET KINDLETRUEFALSE=false{kindle}
SET VALIDEDITION=false


IF /I "%1"=="Kindle" (
set ISBN13=978-0-990-58348-6
set ISBN10=0-990-58348-1
set EDITION=Kindle
set EXT=epub
SET KINDLETRUEFALSE=true{kindle}
set VALIDEDITION=true)
…

Then is setting up build output and locating my tools:

set outputdir=%bookroot%\output
SET intermediate=%outputdir%\intermediate
SET metadata=%bookroot%\metadata
SET imageSource=%bookroot%\image
IF /I "%EDITION%" == "Print" (SET imageSource=%bookroot%\image\hires)
SET bin=%bookroot%\bin
SET pandoc=%bin%\pandoc.exe
SET pp=%bin%\pp.exe
SET preprocessor=%bin%\preprocessor.exe
SET mmd=%bin%\mmd54\multimarkdown.exe
SET pdflatex=%bin%\texlive\bin\win32\pdflatex.exe
SET makeindex=%bin%\texlive\bin\win32\makeindex.exe
SET kindlegen=%bin%\kindlegen.exe
…

%bookroot% is defined in the shortcut that launches the console.

Next is preprocessing to put the right edition label and ISBN in there. It also controls some formatting by setting a variable if this is the print edition (I turn off colors, for example).

IF EXIST %intermediate%\%mmdfile% (%preprocessor% %intermediate%\%mmdfile% !EDITION=%EDITION% !ISBN13=%ISBN13% !ISBN10=%ISBN10% !EBOOKLICENSE="%EBOOKLICENSE%" !PRINTTRUEFALSE=%PRINTTRUEFALSE% !KINDLETRUEFALSE=%KINDLETRUEFALSE% > %intermediate%\%mmdfile_edition%)


Then comes the building. EPUB is simple:

IF /I "%EXT%" == "epub" (%pandoc% --smart -o %outputfilename% --epub-stylesheet styles.css --epub-cover-image=cover-epub.jpg -f %formatextensions% --highlight-style pygments --toc --toc-depth=2 --mathjax -t epub3 %intermediate%\%mmdfile_edition%)


Kindle also generates an EPUB, which it then passes to kindlegen.exe:

IF /I "%EDITION%" == "Kindle" (%pandoc% --smart -o %outputfilename% --epub-stylesheet styles.css --epub-cover-image=cover-epub.jpg -f %formatextensions% --highlight-style haddock --toc --toc-depth=2  -t epub3 %intermediate%\%mmdfile_edition%

%kindlegen% %outputfilename%

PDF (whether for online or print) is significantly more complicated. PDFs need a table of contents and an index, which have to be generated from the TEX file. But first we need the TEX file. But before that, we have to change a couple of things in the MMD file before the TEX conversion, using the custom preprocessor tool. The steps are:

  • Preprocess MMD file to replace some formatting tokens for better Latex code.
  • Convert MMD file to TEX file using mmd.exe
  • Convert TEX file to PDF using pdflatex.
  • Extract index from the PDF using makeindex.
  • Re-run conversion, using the index.
IF /I "%EXT%" == "pdf" (copy %intermediate%\%mmdfile_edition% %intermediate%\temp.mmd
%preprocessor% %intermediate%\temp.mmd ```cs=```{[Sharp]C} ```fasm=```{[x86masm]Assembler} > %intermediate%\%mmdfile_edition%
%mmd% -t latex --smart --labels --output=%intermediate%\%latexfile_edition% %intermediate%\%mmdfile_edition%
%pdflatex% %intermediate%\%latexfile_edition% > %intermediate%\pdflatex1.log
%makeindex% %intermediate%\%indexinputfile% > %intermediate%\makeindex.log
%pdflatex% %intermediate%\%latexfile_edition% %intermediate%\%indextexfile% > %intermediate%\pdflatex2.log

Notice the dumping of output to log files. I used those to diagnose when I got either the MMD or Latex wrong.

There is more in the batch file. The point is to hide the complexity–there are NO manual steps in creating the publishable files. Once export that MMD from Scrivener, I just type “build.bat [edition]” and away I go.

Source Control

Everything is stored in a Subversion repository which I host on my own server. I would have used Git since that’s all the rage these days, but I already had this repo from the first edition. The top level of the 2nd edition directory structure looks like this:

  • BetaReaders – instructions and resources for my beta readers
  • Bin – Location of build.bat as well as all the tools used to build the book.
  • Business – Contracts and other documents around publishing.
  • Cover – Sources and Photoshop file for the cover.
  • CustomToolsSrc – Source code for my preprocessor and other tools that helped me build book.
  • Graphics – Visio and other source files for diagrams.
  • HighPerfDotNet2ndEd.scriv — where Scrivener keeps its files (in RTF format for the content, plus a project file)
  • Image – All images for the book, screenshots or exported from diagrams.
  • Marketing – Some miscellaneous images I used for blog posts, Facebook stuff.
  • Metadata – License text for eBook and styles.css for EPUB formatting.
  • mmd – output folder for MMD file (which I also check into source control–so I can do a build without having Scrivener installed, if necessary).
  • Output – Where all output of the build goes (working files go to output\intermediary)
  • Resources – Documents, help files, guides, etc. that I found that were helpful, e.g., a Latex cheat sheet.
  • SampleChapter – PDF of sample chapter.
  • SampleCode – Source code for all the code in the book.

Tools

  • Scrivener – What I manage the book’s manuscript in. Has a bit of a learning curve, but once you get it set up, it’s a breeze. Only thing I wish is for a command-line version that I could integrate into my build.bat.
  • PdfLatex.exe – You need to get a Latex distribution. I used texlive, but there are more–probably some a lot more minimal than the one I got. It’s big. This is what creates the PDF files.
  • Pp.exe – an opensource preprocessor I used for a while, but it ended up not being able to handle one situation.
  • Preprocessor.exe – Custom tool I wrote to use instead of pp.exe.
  • Multimarkdown – Scrivener has an old version built-in, but I ended up using the new version outside of it for some more control.
  • Pandoc – I use this for the conversion from MMD to EPUB (and Word for internal use).
  • Adobe Digital Editions 3.0 –  This is useful for testing EPUB files for correct display. I couldn’t get the latest version to work correctly.
  • Calibre – In particular, the EPUB editor. For the first edition, I actually edited all the EPUB editions using this to clean up and correct the garbage Word output. For the second edition, I just used it for double-checking and debugging conversion issues.

Useful Web Sites

Don’t Make This Dumb Locking Mistake

What’s wrong with this code:

try
{
    if (!Monitor.TryEnter(this.lockObj))
    {
        return;
    }
    
    DoWork();
}
finally
{
    Monitor.Exit(this.lockObj);
}

This is a rookie mistake, but sadly I made it the other day when I was fixing a bug in haste. The problem is that the Monitor.Exit in the finally block will try to exit the lock, even if the lock was never taken. This will cause an exception. Use a different TryEnter overload instead:

bool lockTaken = false;
try
{
    Monitor.TryEnter(this.lockObj, ref lockTaken))
    if (!lockTaken)
    {
        return;
    }
    
    DoWork();
}
finally
{
    if (lockTaken)
    {
        Monitor.Exit(this.lockObj);
    }
}

You might be tempted to use the same TryEnter overload we used before and rely on the return value to set lockTaken. That might be fine in this case, but it’s better to use the version shown here. It guarantees that lockTaken is always set, even in cases where an exception is thrown, in which case it will be set to false.

Get Your Thread Synchronization Right the First Time

I was recently debugging a problem that just didn’t make any sense at first.

The code looked like this:

class App
{
    public bool IsRunning {get; set;}
    private Thread houseKeepingThread;
    
    public void Start()
    {
        this.IsRunning = true;
        this.houseKeepingThread = new Thread(ThreadFunc);
        this.houseKeepingThread.Start();
    }
    
    private void ThreadFunc()
    {
        while (this.IsRunning)
        {
            DoWork();
            // wait for 30 seconds
        }
    }
};

The actual code was of course a bit more complicated, but this demonstrates the essence of the problem.

The outward manifestation of the bug was that there was evidence that DoWork wasn’t being called over time as it should have.

To debug this, I first concentrated on reasons that the thread could end early, and none of them made any sense.

To finally figure it out, I attached a debugger to a process known to be in a suspect state and discovered evidence in the state of the App object that DoWork had never run, not even once.

I stared at the code for five seconds and then said out loud: “IsRunning isn’t volatile!”

Despite setting IsRunning to true before starting the thread, it is completely possible that the thread starts running before the memory is coherent across all of the threads.

What’s amazing about this bug is that it existed from the very beginning of this application. As in checkin #1. It has probably been causing problems for a while at some low level, but it recently must have gotten worse—it could be for any reason, some change in the pattern of execution, the load on the system, who knows.

The fix was quite easy:

Make a volatile backing field for the IsRunning property.

By using volatile, there will be a memory barrier that will enforce coherency across all threads that access this variable. Problem solved.

The lesson here isn’t about any particular debugging skills. The real lesson is to make sure you get this right in the first place, because debugging it takes far longer and is much trickier than just reasoning about it in the first place. These types of problems can stay hidden and extremely rare for a very long time until some other innocuous change causes them to start manifesting in strange, seemingly impossible ways.

If you want to learn more about memory barriers and when they’re required, you can check out Chapter 4 of Writing High-Performance .NET Code, and there is also this tutorial by Joseph Albahari.

Using MemoryStream to Wrap Existing Buffers: Gotchas and Tips

A MemoryStream is a useful thing to have around when you want to process an array of bytes as a stream, but there are a few gotchas you need to be aware of, and some alternatives that may be better in a few cases. In Writing High-Performance .NET Code, I mention some situations where you may want to use pooled buffers, but in this article I will talk specifically about using MemoryStream specifically to wrap existing buffers to avoid additional memory allocations.

There are essentially two ways to use a MemoryStream:

  1. MemoryStream creates and manages a resizable buffer for you. You can write to and read from it however you want.
  2. MemoryStream wraps an existing buffer. You can choose how the underlying buffer is treated.

Let’s look at the constructors of MemoryStream and how they lead to one of those situations.

  • MemoryStream() – The default constructor. MemoryStream owns the buffer and resizes it as needed. The initial capacity (buffer size) is 0.
  • MemoryStream(int capacity) – Same as default, but initial capacity is what you pass in.
  • MemoryStream(byte[] buffer)MemoryStream wraps the given buffer. You can write to it, but not change the size—basically, this buffer is all the space you will have. You cannot call GetBuffer() to retrieve the original array.
  • MemoryStream(byte[] buffer, bool writable)MemoryStream wraps the given buffer, but you you can choose whether to make the stream writable at all. You could make it a pure read-only stream. You cannot call GetBuffer() to retrieve the original array.
  • MemoryStream(byte[] buffer, int index, int count) – Wraps an existing buffer, allowing writes, but allows you to specify an offset (aka origin) into the buffer that the stream will consider position 0. It also allows you to specify how many bytes to use after that origin as part of the stream. The stream is read-only. You cannot call GetBuffer() to retrieve the original array.
  • MemoryStream(byte[] buffer, int index, int count, bool writable) – Same as previous, but you can choose whether the stream is read-only. The buffer is still not resizable, and you cannot call GetBuffer() to retrieve the original array.
  • MemoryStream(byte[] buffer, int index, int count, bool writable, bool exposable)– Same as previous, but now you can specify whether the buffer should be exposed via GetBuffer(). This is the ultimate control you’re given here, but using it comes with an unfortunate catch, which we’ll see later.

Stream-Managed Buffer

If MemoryStream is allowed to manage the buffer size itself (the first two constructors above), then understanding the growth algorithm is important. The algorithm as currently coded looks like this:

  1. If requested buffer size is less than the current size, do nothing.
  2. If requested buffer size is less than 256 bytes, set new size to 256 bytes.
  3. If requested buffer size is less than twice the current buffer size, set the new size to twice the current size.
  4. Otherwise set capacity to exactly what was requested.

Essentially, if you’re not careful, you will start doubling the amount of memory you’re using, which may be overkill for some situations.

Wrapping an Existing Buffer

You would want to wrap an existing buffer in any situation where you have an existing array of bytes and don’t want to needlessly copy them, causing more memory allocations and thus a higher rate of garbage collections.  For example, you’ve read a bunch of bytes from the wire via HTTP, you’ve got an existing buffer. You need to pass those bytes to a parser that expects a Stream. So far, so good.

However, there is a gotcha here. To illustrate, let’s see a hypothetical example.

You pull some bytes off the wire. The first few bytes are a standard header that all input has, and can be ignored. For the actual content, you have a parser that expects a Stream. Within that stream, suppose there are a subsections of data that have their own parsers. In other words, you have a buffer that looks something like this:

image

To deal with this, you wrap a MemoryStream around the content section, like this:

// comes from network

byte[] buffer = …

// Content starts at byte 24

MemoryStream ms = new MemoryStream(buffer, 24, buffer.Length – 24, writable:false, publiclyVisible:true);

So far so good, but what if the parser for the sub-section really needs to operate on the raw bytes instead of as a Stream? This should be possible, right? After all, publiclyVisible was set to true, so you can call GetBuffer(), which returns the original buffer. There’s just one (major) problem: You don’t know where you are in that buffer.

This may sound like a contrived situation, but it’s completely possible and I’ve run into it multiple times.

See, when you wrapped that buffer and told MemoryStream to consider byte 24 as the start, it set a private field called origin to 24. If you set the stream’s Position to 24, the index into the array is set to 24. That’s position 0. Unfortunately, MemoryStream will not surface the origin to you. You can’t even deduce it from other properties like Capacity, Length, and Position. The origin just disappears, which means that the buffer you get back from GetBuffer() is useless. I consider this a bug in the .NET Framework—why have the ability to retrieve the original buffer if you don’t surface the offset being used? It may be that it would be more confusing, with an additional property that many people won’t understand.

There are a few ways you can choose to handle this:

  1. Derive a child class from MemoryStream that doesn’t do anything except mimic the underlying constructors and store this offset itself and make it available via a property.
  2. Pass down the offset separately. Works, but feels very annoying.
  3. Instead of using MemoryStream, use an ArraySegment<byte> and wrap that (or parts of it) as needed in a MemoryStream.

Probably the cleanest option is #1. If you can’t do that, convert the deserialization methods to take ArraySegment<byte>, which wraps a buffer, an offset, and a length into a cheap struct, which you can then pass to all deserialization functions. If you need a Stream, you can easily construct it from the segment:

byte[] buffer = …

var segment = new ArraySegment<byte>(buffer, 24, buffer.Length – 24);

var stream = new MemoryStream(segment.Array, segment.Offset, segment.Count);

Essentially, make your master buffer source the ArraySegment, not the Stream.

If you find this kind of tip useful, you will love my book Writing High-Performance .NET Code, which will teach you hundreds of optimizations like this as well as the fundamentals of .NET performance engineering.

50 Reasons You Should Be Using Bing

I frequently get asked by family, friends, and acquaintances why they should use Bing over our competitors. This post is a comprehensive answer to that question, as much as it can be.

Note that I’m hardly an unbiased observer. I work for Bing, but I work deep in the layers that do the bulk of query serving, not on user-facing features. If you want a technical peek at the kind of work I typically do, you can read my book about Writing High-Performance .NET Code.

This post isn’t about that. It’s about all of the things I love about Bing. I haven’t been asked to write this. I’m doing it completely on my own, without the knowledge of people whose job it typically is to write about this kind of stuff. But I don’t see many blogs talking about these things consistently, or organizing them into a coherent list. My hope is that this will be that list, updated over time.

So standard disclaimer applies: This blog post is my opinion and may not represent those of my employer.

Second disclaimer: I will not claim that all of the things I list are unique to Bing. Some are, some aren’t, but taken together, they add up to an impressive whole, that I believe is better overall.

Third disclaimer: new features come online all the time, and sometimes features disappear. Tweaks are always being made. Some of the described features may work differently in your market, or may change in the future.

To try these examples out for yourself, you can click on most of the images below to take you to the actual results page on Bing.com.

On to the list:

1. Search Engine Result Quality

Bing’s results are every bit as relevant as Google’s and often more so. While relevance is a science that does have objective measures, I do not know of any publically available reports that compare Bing and Google with any degree of scientific precision. However, reputable sources such as SearchEngineLand have weighed in and found Bing superior in many areas.

Not too surprisingly, there was not a massive disparity in the results of my little test. In fact, Bing came out on top. Some queries performed very differently than others, for example, Bing was able to tell that my query for “Attorney Tom Brady”, was looking for an attorney and not the pictures of the hunky Patriots quarterback served up by Google.

Bing also did well with date nuances, unlike Google…

For the layperson, the relevance of a search engine is often personal and subjective. I enthusiastically recommend the BingItOn challenge that allows you to perform brand-blind search comparisons.

image

Bing certainly did not start out on an equal footing. Even when I started working at Bing over 6 years ago (before it was Bing), I would sometimes have to jump to Google to find something a little less obvious. The only reason I visit Google now is to verify the appearance of my blog and websites in their index.

2. The Home Page Photo

This was the killer feature that “launched” Bing in the minds of many people. Not just any photo, but exceptional works of art from Getty, 500px, and more. (At one time, photo submissions were accepted from Bing employees. I should see if that’s still possible…)

image

These photos showcase the beauty of our world and culture. Localized versions of Bing.com often have different photos on the same day, giving a meaningful interaction to users all over the world.

You can also view pictures from previous days.

3. Dive Into the Photo to Explore the World

In the bottom-right of the photo, there is an Info button that will take you to a search result page with more information about the subject of the photo.

image

In addition, as you move the mouse over the image, four different “hotspots,” marked with semi-transparent squares are highlighted. Clicking on them takes you to search results pages with more information about related topics, such as the location, similar topics, and more.

image

4. Use the Photo as your Windows Desktop Wallpaper

image

Click on the Download button in the lower-right corner to download the image to your computer for use as your wallpaper. A light Bing watermark will be embedded.

5. See Every Amazing Photo from the last 5 Years

Just visit the Bing Homepage Gallery and view every photo in one list, or filter them to try to find your favorites.

image

6. Bing Desktop Brings it all to your Windows Desktop

Bing Desktop takes that gorgeous photo and automatically applies it as your Windows Desktop wallpaper image each day. From the floating toolbar or the task bar, it provides instant access to searching Bing or your entire computer, including inside documents. Bing Desktop also shows you feeds of news, photos, videos, weather, and your Facebook news feed. All of this is configurable. You could use it just to change the wallpaper if you like.

image

7. More Attractive Results Page

Beauty is in the eye of the beholder, but I don’t know if anyone can look at Google’s search results page and claim they’re attractive, especially when laid next to Bing’s. It’s true for nearly all results, but especially true for product searches, technical queries, and many other structured-data type results.

Here is one for a camera. Bing breaks out a bunch of information and review sources on the right, which is already a great head start, but even in the normal web results in the main part of the page, Bing has an edge. The titles, links, and subheadings with ratings all look better.

image

image

Try it out on a bunch of different types of queries. Bing just looks better, in addition to giving great results.

8. Freedom to Innovate

Bing tries a lot of experiments, throws a lot of new features out there to see what works and what doesn’t. We have that freedom to try all sorts of new things that more established players may not enjoy. Bing can change its look and functionality drastically over time to attract new types of users. You will see a lot of new things on Bing if you start paying attention. As a challenger, we are less beholden to advertisers then other search engines.

9. News Carousel

Along the home page photo is a carousel of topics, including top news (customizable to topics you are interested in), weather, trending searches, and more. This list is related to your Cortana entries as well (more on Cortana later).

image

You can collapse this bar in two stages. The first click will remove pictures and reduce the number of headlines.

image

A second click will remove all traces of it, other than the button bringing it back.

image

10. Image Search

Bing’s image search functionality is unparalleled. It presents related searches as well as a ton of filtering mechanisms in an attractive, compact grid that maximizes the screen real estate so you can find what you need faster. Bing also removes duplicates from this list so it doesn’t end up being just a long selection of the exact same image.

image

The filtering mechanism even includes niceties like license type:

image

If you’re searching for people, then you can filter by pose as well.

image

Clicking on an image brings up a pop-up with the larger version of the image. This screen allows you to view the image directly, visit the page it came from, find similar images, Pin it to Pinterest, among other things. Along the bottom is a carousel of the original image search results.

image

11. Video Search

Like image search, video search is far better than the competition. Holding the mouse over a thumbnail results in a playing preview with sound.

image

Clicking on a video brings up a larger preview version with a similar layout as the image search.

Like images, the list of videos also has duplicates removed. While YouTube may command the lion’s share of video these days, Bing will show videos from all over the web.

12. It Does Math For You

Yeah, it will do 4+4 for you, and then bring up an interactive calculator:

image

Big. Deal.

However, it can do advanced math too! It can also solve quadratics and other equations:

image

Handles imaginary numbers to boot. Ok, that’s pretty cool. Does the competition do this? No.

13. Unit Conversion

Yes, it will convert all sorts of lengths, areas, volumes, temperatures, and more, even ridiculous ones:

image

14. Currency Conversion

When I look at my book royalties in Amazon, it displays them in the native currency rather than what I actually care about: good ol’ USD. Bing to the constant rescue:

image

More natural phrasing also works, such as “100 euros in dollars”

15. Finds the Cheapest Flights For You

Searching for: “seattle to los angeles flights” yields this little widget:

image

Update your details and click Find flights and you get:

image

16. Get At-a-Glance University Information

The most useful information about universities is displayed for you right on the results page, including the mailing address, national ranking, enrollment, acceptance rates, tuition, and more, with links to more information.

image

17. Find Online Courses

This is one of the coolest features. Notice the online courses list in the previous image? Those are free, online courses offered by the school. Clicking on them takes you directly the course page where you can sign up.

18. Great Personality and Celebrity Results

You can get a great summary and portal to more information for many, many people. It’s not just limited to the usual actors and recording artists. Atheletes, authors, and more are included too, such as one of my favorite authors, the late, great Robert Jordan (AKA James Oliver Rigney, Jr.):

image

For singers, you can sample some of their tracks right from Bing:

image

Clicking on a song does another search in Bing which gives more information about the song itself, including lyrics, and links to retailers to purchase the song.

19. Song and Lyric Information

Searching for a song title will give you a sidebar similar to that for artists:

image

Searching for lyrics specifically will show those as well:

image

20. Great for Finding “Normals” Too

I don’t have the most popular name (at least in the U.S. – I suspect it’s more common in the U.K.), but if I do a search for it, I get this:

image

That’s…not me.

But if I qualify my name with my job, “Ben Watson Microsoft Bing”, then I get something about me, admittedly not much (hey, I’m not that famous!):

image

Clicking on my name brings up results including this blog and LinkedIn profile.

21. Find Product Buying Guides

This is probably one of the most popular types of searches. I research things both small and large and while there isn’t always a card for each item, often there is.

Try the search “vacuum cleaner recommendations”:

image

Or better, try “Windows Phone reviews” and you get a similar sidebar:

image

If you click on a manufacturer, it brings up a carousel for phones of that brand:

image

Click on those in turn bring up web search results for each one.

22. The Best Search Engine for Programmers

I have so far abstained from showing many Bing vs. Google head-to-head, but I just have to for this. The query is “GC.WaitForPendingFinalizers”, a .NET Framework method.

Here are the first two results of Bing on the left, compared to Google on the right:

image

Bing has a much more attractive and useful layout, links to various .NET versions, and a code sample! For the StackOverflow result, it shows related questions grouped under the most relevant question it found.

23. Time Around the World

My family is spread out throughout the world, from all over the US to Europe. I can generally figure out what time it is on the East coast, but what my family in Arizona, where they don’t have Daily Savings Time—are they in the same time zone as me right now or not? What time is it in Sweden?

image

24. Package Tracking

Just copy & paste the tracking number from your product order into Bing, and you’ve got a link directly to the carrier’s tracking page:

image_thumb39

(The tracking number in that screen shot has been censored by me, and there is no link to a live results page.)

25. Search Within the Site, from Bing

Many web sites have search functions built-in to them. You can take advantage of these directly from Bing. For example, search for the popular book social media site Goodreads.com:

image90

If you then type something into that search back and click “Search” you will be taken to a results page on that web-site directly. Not a huge feature, but it saves you a few clicks.

26. Recipes

You can get top-rated recipes directly in Bing, with enough of a preview to know if you want to read more details.

Here’s a search for “chicken parmesan”:

image96

27. Nutritional Information

Highlighted recipes will have nutrition information, but so will plain foods, such as “pork tenderloin”:

image1011

28. Local Searches

The go-to query for this is “pizza”, but around here pho is nearly as important (to me, anyway). If you search for “pho Redmond” you get a carousel showing the top restaurants. This carousel interacts with the map of the local area:

image112

There is an alternate format that shows up for things without pictures, such as piano stores:

image113

But some topics just have so much about them. Revisiting “pizza”, these results will include the restaurant carousel, nutrition facts, a map, images, and more.

29. City Information

If you do a search for a city, you will get images, some top links for tourist information, and a sidebar containing a map, facts, the current weather, points of interest, and even live webcams!

I lived in Rome for a year, and loved it. There is enough there to fill a month of sight-seeing and still not cover nearly everything. Bing conveys a bit of that:

image118

30. Advanced Search Keywords

Sure, Bing tries to guess what you mean just from the words and phrases you type, but there are ambiguous scenarios that require some more finesse. The ones I use more often are “” (quotes), + (must have), and – (must not have). For example:

“Ben Watson” +Bing –football

Indicates that the phrases “Ben Watson” should be included, Bing must be included, and football must NOT be present.

Start with these advanced search options, and then move on to some more advanced keywords that give you even more power, like:

.NET ext:docx

Will find documents ending with the docx extension containing the word .NET.

or site: which restricts results to pages from a specific site, or language: to specify a particular language.

31. Bing Maps and Bird’s Eye View

Bing Maps by itself is great. It provides all the standard features you expect: directions, live traffic, accident notification, satellite imagery, and more.

But the really cool thing is Bird’s Eye View, which offers an up-close, detailed, isomorphic view of an area. Check out this shot:

image5[1]

You’ll get that view automatically if you keep zooming in, but you can switch to a standard aerial view as well.

32. Mall Maps

Search for a mall near you and see if it has this information. Here’s one from Tysons Corner Center in Virginia:

image15

Now click on Mall Map, which will take you to Bing Maps, but show you a map of the inside of the mall!

image201

You can even switch levels:

image_thumb12

33. Airport Maps

The same inside map feature exists for airports too. Here’s a detail of SeaTac:

image5

You can see individual carrier counters, escalators, kiosks, stores, and more.

34. Venue Maps

I think you get the idea…

image10

35. Answers Demographic Questions

image52


36. Awesome Special Pages

Did you see the Halloween Bing page from 2013? No? I could not find a way to access it now, but someone did put a video of it up:

Bing’s 2013 Halloween home page was interactive

37. Predictions

Bing analyzes historical trends, expert analysis, and popular opinion to predict the outcomes of all sorts of events, including a near-perfect record for the World Cup. Bing can also predict the outcomes of NFL games, Dancing with the Stars, and more.

image17[2]

image22[2]

To see all of the topics Bing can predict (with more coming soon), head over to http://www.bing.com/explore/predicts.

38. Election Results and Predictions

Bing has had real-time election results for a while, but new this time are predictions. Check it out at http://www.bing.com/elections (or just search for elections). It breaks down results and predictions state-by-state, showing elections for the House, Senate, and Governorship.

Bing Elections

39. Find Seats to Local Events

Go to http://www.bing.com/events to find a list of major events in your area. You can filter by type of event (Music, Sports, etc.), city, date, and distance.

You can even submit your own events!

image27[1][2]

40. Language Translation

Bing can translate text for you. For example, I typed the query “translate thank you to italian” and it resulted in:

image57[1][2]

You can also go to http://www.bing.com/translator for more control over what you want translated.

Fun fact: Translation on Facebook is done via Bing:

image_thumb21_thumb

41. Provide feedback on the current query

On the result page, at the bottom, you can provide Feedback about the current query.

image_thumb55_thumb

This goes into a database that gets analyzed to suggest improvements for that query, or the system as a whole.

42. Links to Libraries

When you search for a book, you get a great sidebar, similar to that for songs or artists. Besides the usual links to buy the book, you also get a link to your local library to borrow an eBook version.

snowcrashOther interesting tidbits it gives you are the reading level and other books in the series.

43. Integration Into Windows

Performing a search on your Windows 8 computer shows results from your local computer as well as Bing, all in a seamless, integrated interface. It’s particularly effective on a Surface, with the touch interface.

44. Bing From Xbox One

You can use Bing without a keyboard. Without a mouse. Without a controller. Just your voice! If you have an Xbox One, you can do searches using voice commands, with natural, plain language, e.g., “Show me comedies starring Leslie Nielsen.”

Check out some examples and try them for yourself.

45. Bing is in Office

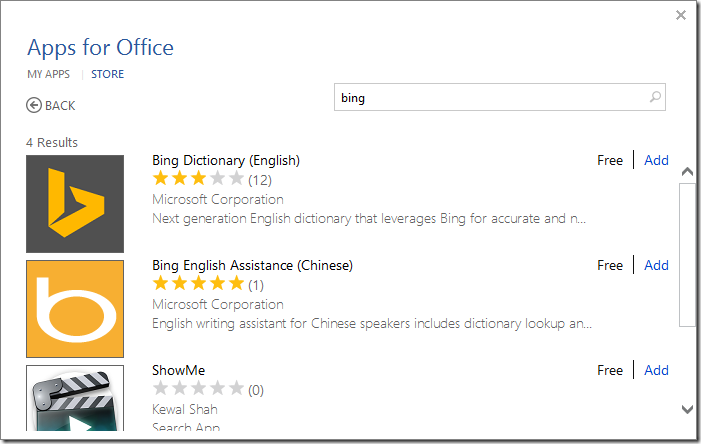
Bing is integrated into Microsoft Office. You can add Apps into Office that utilize Bing. You do this from the Insert tab on the Ribbon, under My Apps:

image_thumb69_thumb

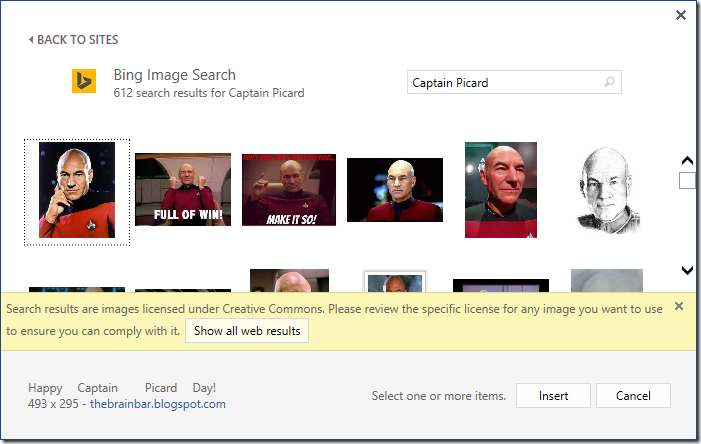
You can also insert images into your document, directly from Bing (via Insert | Online Pictures:

image_thumb71_thumb

46. Cortana

http://ts4.mm.bing.net/th?id=HN.608053303690136121&pid=1.7

Cortana is awesome. You can have her record notes for you, remind you to do something at a specific time, search for something, even tell you a corny joke or sing a song.

The best part is that Cortana is powered by Bing and learns from your interests.

If you have Windows Phone, then you should definitely take some time to learn about how you can interact with Cortana.

(Sidebar: Do you wonder who Cortana really is?)

47. Bing Rewards

You can get points for each query you do, for specific tasks, for inviting friends, and more. With the points, you can redeem small prizes. I usually get enough Amazon gift certificates to get something decent every few months.

Go to http://www.bing.com/rewards to sign up, view your status, or redeem the points. Some of the gifts:

  • Xbox Live Gold Membership
  • Xbox Music Pass
  • Amazon gift cards
  • Windows Store gift cards
  • Skype credits,
  • OneDrive storage
  • Ad-free Outlook.com
  • Flowers
  • Restaurants
  • Movie tickets

By itself, the program isn’t going to change your life significantly, but it’s a nice little perk.

48. Bing is the Portal for your Microsoft Services

Above the photo, there is a bar with links to the most popular Microsoft destinations, including MSN, Outlook.Com, and Office Online.

image137[2]

49. High-Quality Partners

Microsoft has partnerships with many, many companies to ingest structured data from all over the world in many contexts. Some of the most obvious are Yelp and Trip Advisor. We also have partnerships with Twitter, Apple, Facebook, and many more.

50. Bing is the Portal to Your Day and the World

Yes, Bing is a search engine, and a GREAT one at that, but as demonstrated throughout this entire article, it does a lot more. By organizing and presenting the information in an attractive format, it aspires to be a lot more than just 10 blue links. You can learn and grow, find your information faster, explore related topics, answer your questions, and solve more problems. Bing is for people who want to experience the world.

It looks better, it performs better, it is awesome.

Digging Into .NET Object Allocation Fundamentals

[Note: this article also appeared on CodeProject]

Introduction

While understanding garbage collection fundamentals is vital to working with .NET, it is also important to understand how object allocation works. It shows you just how simple and performant it is, especially compared to the potentially blocking nature of native heap allocations. In a large, native, multi-threaded application, heap allocations can be major performance bottleneck which requires you to perform all sorts of custom heap management techniques. It’s also harder to measure when this is happening because many of those details are hidden behind the OS’s allocation APIs. More importantly, understanding this will give you clues to how you can mess up and make object allocation far less efficient.

In this article, I want to go through an example taken from Chapter 2 of Writing High-Performance .NET Code and then take it further with some additional examples that weren’t covered in the book.

Viewing Object Allocation in a Debugger

Let’s start with a simple object definition: completely empty.

class MyObject 
{
}

static void Main(string[] args)
{
    var x = new MyObject();
}

In order to examine what happens during allocation, we need to use a “real” debugger, like Windbg. Don’t be afraid of this. If you need a quick primer on how to get started, look at the free sample chapter on this page, which will get you up and running in no time. It’s not nearly as bad you think.

Build the above program in Release mode for x86 (you can do x64 if you’d like, but the samples below are x86).

In Windbg, follow these steps to start and debug the program:

  1. Ctrl+E to execute a program. Navigate to and open the built executable file.
  2. Run command: sxe ld clrjit (this tells the debugger to break on loading any assembly with clrjit in the name, which you need loaded before the next steps)
  3. Run command: g (continues execution)
  4. When it breaks, run command: .loadby sos clr (loads .NET debugging tools)
  5. Run command: !bpmd ObjectAllocationFundamentals Program.Main (Sets a breakpoint at the beginning of a method. The first argument is the name of the assembly. The second is the name of the method, including the class it is in.)
  6. Run command: g

Execution will break at the beginning of the Main method, right before new() is called. Open the Disassembly window to see the code.

Here is the Main method’s code, annotated for clarity:

; Copy method table pointer for the class into
; ecx as argument to new()
; You can use !dumpmt to examine this value.
mov ecx,006f3864h
; Call new
call 006e2100 
; Copy return value (address of object) into a register
mov edi,eax

Note that the actual addresses will be different each time you execute the program. Step over (F10, or toolbar) a few times until call 006e2100 (or your equivalent) is highlighted. Then Step Into that (F11). Now you will see the primary allocation mechanism in .NET. It’s extremely simple. Essentially, at the end of the current gen0 segment, there is a reserved bit of space which I will call the allocation buffer. If the allocation we’re attempting can fit in there, we can update a couple of values and return immediately without more complicated work.

If I were to outline this in pseudocode, it would look like this:

if (object fits in current allocation buffer)
{
   Increment a pointer, return address;
}
else
{
   call JIT_New to do more complicated work in CLR
}

The actual assembly looks like this:

; Set eax to value 0x0c, the size of the object to
; allocate, which comes from the method table
006e2100 8b4104          mov     eax,dword ptr [ecx+4] ds:002b:006f3868=0000000c
; Put allocation buffer information into edx
006e2103 648b15300e0000  mov     edx,dword ptr fs:[0E30h]
; edx+40 contains the address of the next available byte
; for allocation. Add that value to the desired size.
006e210a 034240          add     eax,dword ptr [edx+40h]
; Compare the intended allocation against the
; end of the allocation buffer.
006e210d 3b4244          cmp     eax,dword ptr [edx+44h]
; If we spill over the allocation buffer,
; jump to the slow path
006e2110 7709            ja      006e211b
; update the pointer to the next free
; byte (0x0c bytes past old value)
006e2112 894240          mov     dword ptr [edx+40h],eax
; Subtract the object size from the pointer to
; get to the start of the new obj
006e2115 2b4104          sub     eax,dword ptr [ecx+4]
; Put the method table pointer into the
; first 4 bytes of the object.
; eax now points to new object
006e2118 8908            mov     dword ptr [eax],ecx
; Return to caller
006e211a c3              ret
; Slow Path - call into CLR method
006e211b e914145f71      jmp     clr!JIT_New (71cd3534)

In the fast path, there are only 9 instructions, including the return. That’s incredibly efficient, especially compared to something like malloc. Yes, that complexity is traded for time at the end of object lifetime, but so far, this is looking pretty good!

What happens in the slow path? The short answer is a lot. The following could all happen:

  • A free slot somewhere in gen0 needs to be located
  • A gen0 GC is triggered
  • A full GC is triggered
  • A new memory segment needs to be allocated from the operating system and assigned to the GC heap
  • Objects with finalizers need extra bookkeeping
  • Possibly more…

Another thing to notice is the size of the object: 0x0c (12 decimal) bytes. As covered elsewhere, this is the minimum size for an object in a 32-bit process, even if there are no fields.

Now let’s do the same experiment with an object that has a single int field.

class MyObjectWithInt { int x; }

Follow the same steps as above to get into the allocation code.

The first line of the allocator on my run is:

00882100 8b4104          mov     eax,dword ptr [ecx+4] ds:002b:00893874=0000000c

The only interesting thing is that the size of the object (0x0c) is exactly the same as before. The new int field fit into the minimum size. You can see this by examining the object with the !DumpObject command (or the abbreviated version: !do). To get the address of the object after it has been allocated, step over instructions until you get to the ret instruction. The address of the object is now in the eax register, so open up the Registers view and see the value. On my computer, it has a value of 2372770. Now execute the command: !do 2372770

You should see similar output to this:

0:000> !do 2372770
Name:        ConsoleApplication1.MyObjectWithInt
MethodTable: 00893870
EEClass:     008913dc
Size:        12(0xc) bytes
File:        D:\Ben\My Documents\Visual Studio 2013\Projects\ConsoleApplication1\ConsoleApplication1\bin\Release\ConsoleApplication1.exe
Fields:
      MT    Field   Offset                 Type VT     Attr    Value Name
70f63b04  4000001        4         System.Int32  1 instance        0 x

This is curious. The field is at offset 4 (and an int has a length of 4), so that only accounts for 8 bytes (range 0-7). Offset 0 (i.e., the object’s address) contains the method table pointer, so where are the other 4 bytes? This is the sync block and they are actually at offset -4 bytes, before the object’s address. These are the 12 bytes.

Try it with a long.

class MyObjectWithLong { long x; }

The first line of the allocator is now:

00f22100 8b4104          mov     eax,dword ptr [ecx+4] ds:002b:00f33874=00000010

Showing a size of 0x10 (decimal 16 bytes), which we would expect now. 12 byte minimum object size, but 4 already in the overhead, so an extra 4 bytes for the 8 byte long. And an examination of the allocated object shows an object size of 16 bytes as well.

0:000> !do 2932770
Name:        ConsoleApplication1.MyObjectWithLong
MethodTable: 00f33870
EEClass:     00f313dc
Size:        16(0x10) bytes
File:        D:\Ben\My Documents\Visual Studio 2013\Projects\ConsoleApplication1\ConsoleApplication1\bin\Release\ConsoleApplication1.exe
Fields:
      MT    Field   Offset                 Type VT     Attr    Value Name
70f5b524  4000002        4         System.Int64  1 instance 0 x

If you put an object reference into the test class, you’ll see the same thing as you did with the int.

Finalizers

Now let’s make it more interesting. What happens if the object has a finalizer? You may have heard that objects with finalizers have more overhead during GC. This is true–they will survive longer, require more CPU cycles, and generally cause things to be less efficient. But do finalizers also affect object allocation?

Recall that our Main method above looked like this:

mov ecx,006f3864h
call 006e2100 
mov edi,eax

If the object has a finalizer, however, it looks like this:

mov     ecx,119386Ch
call    clr!JIT_New (71cd3534)
mov     esi,eax

We’ve lost our nifty allocation helper! We have to now jump directly to JIT_New. Allocating an object that has a finalizer is a LOT slower than a normal object. More internal CLR structures need to be modified to track this object’s lifetime. The cost isn’t just at the end of object lifetime.

How much slower is it? In my own testing, it appears to be about 8-10x worse than the fast path of allocating a normal object. If you allocate a lot of objects, this difference is considerable. For this, and other reasons, just don’t add a finalizer unless it really is required.

Calling the Constructor

If you are particularly eagle-eyed, you may have noticed that there was no call to a constructor to initialize the object once allocated. The allocator is changing some pointers, returning you an object, and there is no further function call on that object. This is because memory that belongs to a class field is always pre-initialized to 0 for you and these objects had no further initialization requirements. Let’s see what happens if we change to the following definition:

class MyObjectWithInt { int x = 13; }

Now the Main function looks like this:

mov     ecx,0A43834h
; Allocate memory
call    00a32100
; Copy object address to esi
mov     esi,eax
; Set object + 4 to value 0x0D (13 decimal)
mov     dword ptr [esi+4],0Dh

The field initialization was inlined into the caller!

Note that this code is exactly equivalent:

class MyObjectWithInt { int x; public MyObjectWithInt() { this.x = 13; } }

But what if we do this?

class MyObjectWithInt 
{ 
    int x; 

    [MethodImpl(MethodImplOptions.NoInlining)]  
    public MyObjectWithInt() 
    { 
        this.x = 13; 
    } 
}

This explicitly disables inlining for the object constructor. There are other ways of preventing inlining, but this is the most direct.

Now we can see the call to the constructor happening after the memory allocation:

mov     ecx,0F43834h
call    00f32100
mov     esi,eax
mov     ecx,esi
call    dword ptr ds:[0F43854h]

Exercise for the Reader

Can you get the allocator shown above to jump to the slow path? How big does the allocation request have to be to trigger this? (Hint: Try allocating arrays of various sizes.) Can you figure this out by examining the registers and other values from the running code?

Summary

You can see that in most cases, allocation of objects in .NET is extremely fast and efficient, requiring no calls into the CLR and no complicated algorithms in the simple case. Avoid finalizers unless absolutely needed. Not only are they less efficient during cleanup in a garbage collection, but they are slower to allocate as well.

Play around with the sample code in the debugger to get a feel for this yourself. If you wish to learn more about .NET memory handling, especially garbage collection, take a look at the book Writing High-Performance .NET Code.

iTunes 11.4 not syncing/refreshing podcasts? How I resolved it

In general, I try to avoid Apple products when I can, but I do use and enjoy and iPod Nano for podcasts.

With the recent update to 11.4 I noticed that my podcasts were not refreshing, either on a schedule or on-demand. I tried restarting iTunes, unplugging the iPod, restarting the computer – nothing. Until I looked in the settings.

Look at this setting:

(Windows version: Edit | Preferences | Store)

image

Uncheck the highlighted setting. I’m not sure how this feature is supposed to work, but once disabled, podcasts started refreshing correctly again.

5 More Attributes of Highly Effective Programmers

Nearly 7 years ago, I wrote a little article called The Top 5 Attributes of Highly Effective Programmers that got some good feedback and has proven popular over time.

One matures as a developer, of course. I wrote that last article quite closer to the beginning of my career. Over the last few years, especially at Microsoft, I’ve had the opportunity to witness a much wider range of behaviors. I’ve been able to develop a much better sense of what differentiates the novice from the truly effective developer.

The difference in skills can be truly staggering if you’re not used to seeing it. A new programmer, or one who has not learned much from experience, can often be an order of magnitude or more less productive than a good, experienced developer. You don’t want to spend very long at the bottom of this kind of ranking. Some of this is just experience, but in many cases it’s just a mindset–there are plenty of “experienced” developers who haven’t actually learned to improve. It’s true in many professions, but especially so in programming–you can’t plateau. You have to keep learning. The world changes, programming changes, and what was true 10 years ago is laughably outdated.

The attributes I listed in the previous article are still applicable. They are still valuable, but there is more. Note that I am not claiming in this article that I’ve mastered these. I still aspire to meet higher standards in each of these areas. Remember that it is not hypocrisy to espouse good ideas, even while struggling to live up to them. These are standards to live up to, not descriptions of any one person I know (though I do know plenty of people who are solid in at least one of these areas).

Sense of Ownership

Ownership means a lot of things, but mainly that you don’t wait for problems to find you. It means that if you see a problem, you assume it’s your job to either fix it or find someone else who can, and then to make sure it happens. It means not ignoring emails because, hey, not my problem! It means taking issues seriously and making sure they are dealt with. Someone with a sense of ownership would never sweep a problem under the rug or blithely hope that someone else will deal with it.

You could equate ownership with responsibility, but I think it goes beyond that. “Responsibility” often takes on the hue of a burden or delegation of an unwelcome task, while “ownership” implies that you are invested in the outcome.

Ownership often means stepping outside of your comfort zone. You may think you’re not the best person to deal with something, but if no one else is doing it, than you absolutely are. Just step up, own the problem, and get it done.

Ownership does not mean that you do all the work–that would be draining, debilitating, and ultimately impossible. It does not mean that you specify bounds for your responsibility and forbid others to encroach. It especially does not mean code ownership in the sense that only you are allowed to change your code.

Ownership is a mentality that defies strict hierarchies of control in favor of a more egalitarian opportunism.

Closely related to the idea of ownership is taking responsibility for your mistakes. This means you don’t try to excuse yourself, shift blame, or minimize the issue unnecessarily. If there’s a problem you caused, be straight about it, explain what happened, what you’re going to do to prevent it, and move on.

Together, these ideas on ownership will gain you a reputation as someone who wants the best for the team or product. You want to be that person.

Remember, if you are ever having the thought, Someone ought to…–stop! That someone is you.

Data-Driven

A good developer does not make assumptions. Experience is good, yes, but data is better. Far, far better. Knowing how to measure things is far more important than being able to change them. If you make changes without measuring, then you’re just a random-coding monkey, just guessing that you’re doing something useful. Especially when it comes to performance, building a system to automatically measure performance is actually more important than the actual changes to performance. This is because if you don’t have that system, you will spend far more time doing manual measurement than actual development. See the section on Automation below.

Measurement can be simple. For some bugs, the measurement is merely, does the bug repro or not? For performance tuning of data center server applications, it will likely be orders of magnitude more complicated and involve systems dedicated to measurement.

Determining the right amount of data to make a decision is not always easy. You do have to balance this with expediency, and you don’t want to hold good ideas hostage to more measurement than necessary. However, there is very little you should that do completely blind with no data at all. As a developer, your every action should be independently justifiable.

The mantra of performance optimization is Measure, Measure, Measure. This should be the mantra of all software development. Are things improving or not? Faster or not? How much? Are customers happier or not? Can tasks be completed easier? Are we saving more money? Does it use less memory? Is our capacity larger? Is the UI more responsive? How much, exactly?

The degree to which you measure the answer to those questions is in large part dependent on how important it is to your bottom line.

My day job involves working on an application that runs on thousands of servers, powering a large part of Bing. With something like this, even seemingly small decisions can have a drastic effect in the end. If I make something a bit more inefficient, it could translate into us needing to buy more machines. Great, now my little coding change that I didn’t adequately measure is costing the company hundreds of thousands of extra dollars per year. Oops.

Even for smaller applications, this can be a big deal. For example, making a change that causes the UI to be 20% more sluggish in some cases may not be noticed if you don’t have adequate measurement in place, but if it leads to a bad review by someone who noticed it, and there are adequate competitors, that one decision could be a major loss of revenue.

Solid Tests

Notice that I don’t say “tests”, unqualified. Good tests, solid, repeatable tests. Those are the only ones worth having.

If you see a code change that doesn’t have accompanying test changes, don’t be afraid to ask the question, “Where are the tests?” The answer might be that existing tests cover the change, or that tests at a larger scope, or in a different change will cover it, but the point is to ask the question, and make sure there is a satisfactory answer. “Manual test” is a valid response sometimes, but this should be very rare, and justifiable.

I cannot say how many times I’ve been saved due to the hundreds of unit tests that exercise my code, especially when I’m attempting a big internal refactor, usually for performance reasons.

As important as good tests are, it’s also important to get rid of bad tests. Don’t waste resources on things that aren’t helpful. Insist on a clean, reliable test suite. I’m not sure which is worse: no tests, or tests you can’t rely on. Eventually, unreliable tests become the same as having no tests at all.

Automation

An effective developer is always trying to put themselves out of a job. Seriously. There is more work than you can possibly fit in the time allotted. Automate the heck out of the stuff that annoys you, trips you up, is repetitive, is frequent, is error-prone. Once you can break down a process into something so deterministic that you could write a script for someone else to follow and get the same result, then make sure that someone else is a program.

This is more than just simple maintenance scripts for server management. This is ANY part of your job. Collecting data? Get it automatically ingested into the systems that need it. Generating reports? If you’ve generated the same report more than twice, don’t do it a third time. Your build system requires more than a single step? What’s wrong with you?

You have to free yourself up for more interesting, more creative work. You’re a highly paid programmer. Act like it.

Example: One of my jobs in the last year has been to run regular performance profiling, analyze the results, and send them to my team, making suggestions for future focus. This involved a bunch of steps:

  1. Log onto a random machine in the datacenter.
  2. Start a 120-second CPU profile.
  3. Wait for 120-seconds plus a few minutes for processing, symbol resolution, etc.
  4. Compress file, copy to my machine
  5. Analyze file–group, filter, and sort data according to various rules.
    1. Look for a bunch of standard things that I always report on
  6. Do the same thing for a 900-second memory/exception/thread/etc. profile.

This took about an hour each time, sometimes more.

I realized that every single part of this could happen automatically. I a wrote a service that gets deployed to every datacenter machine. A couple of times per day it checks to see whether we need a profile, whether the machine is in a good state to profile, etc.. It then runs the profiler, collects the data, and even analyzes the data automatically (See Chapter 8 of Writing High-Performance .NET Code for a hint about how I did this). This all gets uploaded to a file server and the analysis gets displayed on a web-site. No intervention whatsoever. Not only do I not have to do this work myself anymore, but others are empowered to look at the data for themselves, and we can easily add more analysis components over time.

Unafraid of Communication

The final thing I want to talk about is communication. This has been a challenge for me. I definitely have the personality type that really likes to disappear into a cave and pound on a keyboard for a few days, to emerge at the end with some magical piece of code. I would delete Outlook from my computer if I could.

This kind of attitude might serve you well for a while, but it’s ultimately limiting.

As you get more senior, communication becomes key. Effective communication skills are one of the things you can use to distinguish yourself to advance your career.

Effective communication can begin with a simple acknowledgement of someone’s issue, or an explanation that you’re working on something, with a follow-up to everyone involved at regular points. Nobody likes to be kept in the dark, especially for burning issues. For time-critical issues, a “next update in XX hours” can be vital.

Effective communication also means being able to say what you’re working on and why it’s cool.

Eventually, it means a lot more–being able to present complicated ideas to many other people in a simple, understandable, logical way.

Good communication skills enable you to be able to move beyond implementing software all by yourself to helping teams as a whole do better software. You can have a much wider impact by helping and teaching others. This is good for your team, your company, and your career.

Do you have a good engineering culture?

I assume one big prerequisite to all of these attributes: You must have a solid engineering environment to operate in. If management gives short shrift to employee happiness, sound software engineering principles, or the workplace is otherwise toxic, than perhaps you need to focus on changing that first.

If your leaders are so short-sighted that they can’t stand the thought of you automating your work instead of just getting the job done, that’s a problem.

If bringing up problems or admitting fault to a mistake is a career-limiting move, then you need to get out soon. That’s a team that will eventually implode under the weight of cumulative failure that no one wants to address.

Don’t settle for this kind of workplace. Either work to change it or find some place better.


Goodbye, Wireless!

I’m going to talk about a product today, and no, this post is not sponsored. This is just something I recently started using and it really worked out for me.

When we moved into our current home, I knew I wanted to setup a media center on our TV. It would incorporate Windows Media Center with the MediaBrowser plugin, an array of disks storing all of our house’s media (all legal of course!), a remote control, the NetFlix plugin, etc. The only weakness in the whole system was the network. I went through a couple of wireless card and antenna solutions, even upgrading our router to one that could do 5 ghz and dedicated that to just the Media Center.

It worked ok, but there were some downsides:

  • The wireless speed never quite lived up to what was advertised. Partly this is because of the configuration and placement of the TV/computer—5 ghz is far more directional than the standard 2.4 ghz–but I was also probably expecting too much.
  • Because of this, the disk array had to be physically plugged into the media center computer to be reliable. This increased the clutter of the living room–one more ugly box that wouldn’t fit inside the media cabinet—and made managing that storage space a pain.

I was starting to consider wiring our house for Ethernet when a friend mentioned this: the D-Link PowerLine AV 500. Power-line networking. The last I had heard about this was probably 10 years ago when it was first being introduced, and I haven’t given it a thought since. These adaptors are the epitome of ease. One of them goes into a socket near my router, with a network cable going from router to adapter. The other adapter goes next to my media center, with another connecting ethernet cable. There’s a simple software utility (or just push-button) to secure them to prevent others from leaching your Internet (if you have shared wiring).

It has made all of the difference. No more unsightly wireless antenna, the disk array has been moved upstairs to the office, and the speeds are MUCH faster than before. There is no issues whatsoever streaming high-def over this network. If you’ve got a media center that needs to be far away from your router, then this is the thing to get.

How To Debug GC Issues Using PerfView

Update: If you find this article useful, you can find a lot more information about garbage collection, debugging, PerfView, and .NET performance in my book Writing High-Performance .NET Code.

In my previous artlcle, I discussed 4 ways to optimize your server application for good garbage collection performance. An essential part of that process is being able to analyze your GC performance to know where to focus your efforts. One of the first tools I always turn to is a little utility that has been publically released by Microsoft.

PerfView Overview

PerfView is a stand-alone, no-install utility that can help you debug CPU and memory problems. It’s so light-weight and non-intrusive that it can be used to diagnose production applications with minimal impact.

I’ve never used it for CPU performance, so I can’t comment on that aspect of it, but that is the primary use for it (which is helpful to keep in mind when trying to grok the “quirky” UI).

PerfView collects data in two ways (as far as memory analysis is concerned):

  1. ETW tracing – This is the heart and soul of PerfView. It’s primarily an event analyzer with advanced grouping abilities to show you only the important things. If you want to know more about ETW, see this series at the ntdebugging blog.
  2. Heap dump – PerfView can dump the heap of your process and apply the same analysis and views that it does for events.

The basic view of the utility is a spreadsheet-like UI with function names and associated inclusive/exclusive costs – just like you would expect to see in a typical CPU profiler. The same paradigm is useful for memory analysis as well.

There are other views that summarize the collected events for you in easy-to-understand reports. We’ll take a quick look at all of this.

In this article, I’ll use PerfView to show you how to see the following:

  • How frequently garbage collections occur and how long they take.
  • The cause for Gen2 collections.
  • The source of large-object allocations.
  • The roots of all the memory in the heap to see who’s holding on to it.
  • A diff of the heap to see what’s changing most frequently.

Test Program

When using a new utility like this, it’s often extremely helpful to create your own test programs with known behavior to ensure that you can use the utility to see what you expect. I’ve created a very simple one, here:

class Program
{
    private static List<int[]> arrays = new List<int[]>();
    private static Random rand = new Random();

    static void Main(string[] args)
    {            
        Console.WriteLine("Press any key to exit...");
        while (!Console.KeyAvailable)
        {
            int size = rand.Next(1024, 100000);
            int[] newArray = new int[size];
            arrays.Add(newArray);
            System.Threading.Thread.Sleep(10);
        }
        Console.WriteLine("Done, exiting");
    }
}

This program “leaks” memory by continually creating arrays and storing them in a list that never gets cleared.

I also make it use server GC, to match what I discussed in the first article.

You can download the sample solution here.

Taking a Trace

When you startup PerfView, you’ll see a window like this:

image

The manual is completely integrated into the program and can be accessed using the links in the menu bar. It’s a fairly dense information dump, but you can learn quite a bit about how to really get the most of out this utility.

First, start the test program and let it run in the background until we’re done taking the trace.

In PerfView, open the Collect menu and select the Collect command. A collection dialog will appear. Don’t change any setting for the moment and just hit Start Collection.You’ll see some status indicating the size and duration of the data collected. Let it go for at least 30 seconds. Note that you don’t specify which process you’re interested in at this stage – PerfView collects events for the machine as a whole.

image

When you’re done click Stop Collection. PerfView will process the collected events for a few seconds or minutes, and then a window will pop up asking you to select a process. Just cancel this (it wants to show you a CPU profile, which we’re not interested in right now) to get back to main screen.

You’ll now see a file show up: PerfViewData.etl (unmerged). Click on the little arrow next to this and you’ll see:

image

From this, we’ll find all the data we’re interested in.

Get GC Stats (pause times and more)

The first place to start is just to get an overall picture of GC performance for your app. There is a view for just that. Double-click the GCStats report, and that will bring up a window with tables for each app. Find MemoryLeak.exe

My test run yields this summary table:

image

Every garbage collection was a generation 2 collection (that’s generally a bad thing), but at least they were fast (to be expected in such a simple program).

Reason for Gen 2 Collection

Gen 2 GCs can happen for two reasons—surviving a gen 1 collection, or allocating on the large object heap. This view will also tell us, further down, which of these is the reason:

image

The collections happened because of large object allocation. You can also see that the second GC happened about 14 seconds after the first, and the next about 32 seconds after that. There are tons of other stats in this view, so look around and see what you can divine about the program’s behavior from this.

Get Source of Large Allocations

From the main PerfView screen, open the GC Heap Alloc Stacks view and find the correct process. This shows you a list of objects which represent the tops of allocation stacks.

image

PerfView has helpfully organized all large-object allocations under the LargeObject entry. Double click this to see all such all allocations:

image

Important: If you see entries like this:

OTHER <<clr?>>

Then right-click on the list and click on Lookup Symbols. Follow the instructions to get the symbol server setup so you can see CLR and Windows function names.

From the above entry view, it’s apparent that the vast majority of large objects are arrays being allocated in Main()—exactly what we expect given our predictable leaky program.

A note on the strange column names: remember how I said this program is designed for CPU profiling? These are typical columns for showing% of CPU time in various parts of a stack, repurposed for memory analysis. Inc % is the percent of bytes allocated on this object compared to all recorded allocations, Inc is the number of bytes allocated, and Inc Ct is the number of objects allocated.

In the above example, this reads: Allocated 6589 arrays for a total of 3.9 GB, accounting for 98% of the memory allocated in the process.

By the way, these are not 100% accurate numbers. There is some sampling going on because of how the events work, but it should be fairly close in most applications.

Who’s Referencing Leaking Memory?

One of the few ways to “leak” memory in C# is to hold onto it unknowingly. By taking a heap dump, we can see the path of object references for who’s holding onto memory.

We’ll need to do a different type of collection. In the main PerfView window. Go to the Memory menu and click Take Heap Snapshot.

image

Find your process and click Dump GC Heap. This performs a live heap walk (that is, the application continues running, so it’s possible the view is slightly inconsistent—not usually an issue), sampling what it finds, and presenting the results in the same type of view as before:

image

Right away you can see that the static variable MemoryLeak.Program.arrays is holding onto 100% of memory in our application. The stack to the root isn’t that interesting in this case because all static variables are rooted directly, but if this were a member field, you would see the hierarchy of objects that are holding onto these references.

Use Two Heap Dumps to see What’s Increasing Fastest

While the test program is still running, take another heap dump, ensuring you save it to a different file. Open both dump views and in the second one, go to the Diff menu and there will be an option to use the other file as a baseline for the diff. This will bring up another window showing you the changes between the two dump files—extremely helpful for narrowing down the most likely areas for leaks.

Important: If you want to analyze the perf trace on a different computer than the one you took it on, you must tell PerfView to merge the file—this will cause all the different files it generated to be combined and symbols reconciled. Just right-click on the ETL file and select Merge. You can also optionally Zip the file (which implies a Merge).

Next Time

Next time, we’ll look at some more drastic measures for protecting yourself against expensive GCs—for when all else fails.

Resources

  • Download the sample test program here.
  • Get PerfView here.